bolt Quick Answer (As of 2026)
A room can have plenty of light and still feel poorly lit.
A room can have plenty of light and still feel poorly lit.
The problem is often not the number of fixtures or the brightness of the LED light bulbs. It is the lack of layering. When every light in a room performs the same job, the result can feel flat, harsh, or uncomfortable. A better lighting design combines three distinct layers: ambient lighting for overall visibility, task lighting for practical activities, and accent lighting for visual emphasis.
This approach is used by professional lighting designers in homes, offices, hotels, restaurants, retail spaces, and commercial interiors. It allows you to control not only how bright a room is, but also where attention is directed and how the space feels at different times of day.
Modern LEDs make layered lighting easier than ever. Energy-efficient light bulbs, recessed downlights, LED strips, spotlights, wall fixtures, and smart lighting systems can all work together.
The trick is knowing what each layer should accomplish.
In this guide, we'll explore how to combine ambient, task, and accent lighting using LED technology, how to select the right lumen output and color temperature, how to position fixtures, and how to avoid the common mistakes that make a lighting scheme look uneven or overly bright.
What Is Layered Lighting?
Layered lighting means using multiple lighting sources with different purposes rather than relying on one central fixture.
The three primary layers are
- Ambient lighting — general illumination for the entire room
- Task lighting — focused light for specific activities
- Accent lighting — directional or decorative light that highlights selected features
Think of a well-designed room like a photograph.
Ambient lighting establishes the overall exposure.
Task lighting provides clarity where detailed work happens.
Accent lighting adds contrast and directs the eye toward important features.
The three layers should work together rather than compete.
The Three Layers of LED Lighting at a Glance
- Lighting Layer
- Primary Purpose
- Common LED Fixtures
- Typical Applications
- Ambient
- General illumination
- LED bulbs, downlights, ceiling fixtures
- Living rooms, bedrooms, offices
- Task
- Focused illumination
- Under-cabinet LEDs, desk lamps, reading lights
- Kitchens, desks, vanities
- Accent
- Highlighting and atmosphere
- Spotlights, LED strips, wall washers
- Artwork, shelves, architectural details
A successful lighting plan doesn't necessarily require all three layers in every corner of a room.
Instead, consider what the space is used for.
A kitchen may need strong task lighting.
A living room may benefit from more accent lighting.
A hallway may need primarily ambient illumination with subtle accent effects.
Layer 1: Ambient Lighting
Ambient lighting is the foundation of your lighting design.
Its job is to provide enough general illumination for people to move around comfortably and perform everyday activities without relying on localized fixtures.
Common sources include
- Ceiling-mounted LED fixtures
- Recessed downlights
- LED panel lights
- Chandeliers
- Flush-mount ceiling fixtures
- Multiple LED light bulbs in a central fitting
Ambient lighting should generally be comfortable and reasonably uniform.
However, "uniform" doesn't mean every square meter must have exactly the same brightness.
A room with completely flat illumination can feel sterile.
The objective is to establish a comfortable baseline that other lighting layers can build upon.
Using LED Light Bulbs for Ambient Lighting
Traditional ceiling fixtures with replaceable lamps can still be excellent sources of ambient lighting.
Modern LED light bulbs offer several advantages
- Low energy consumption
- Long operating life
- High lumen output
- Multiple color temperatures
- Dimming options
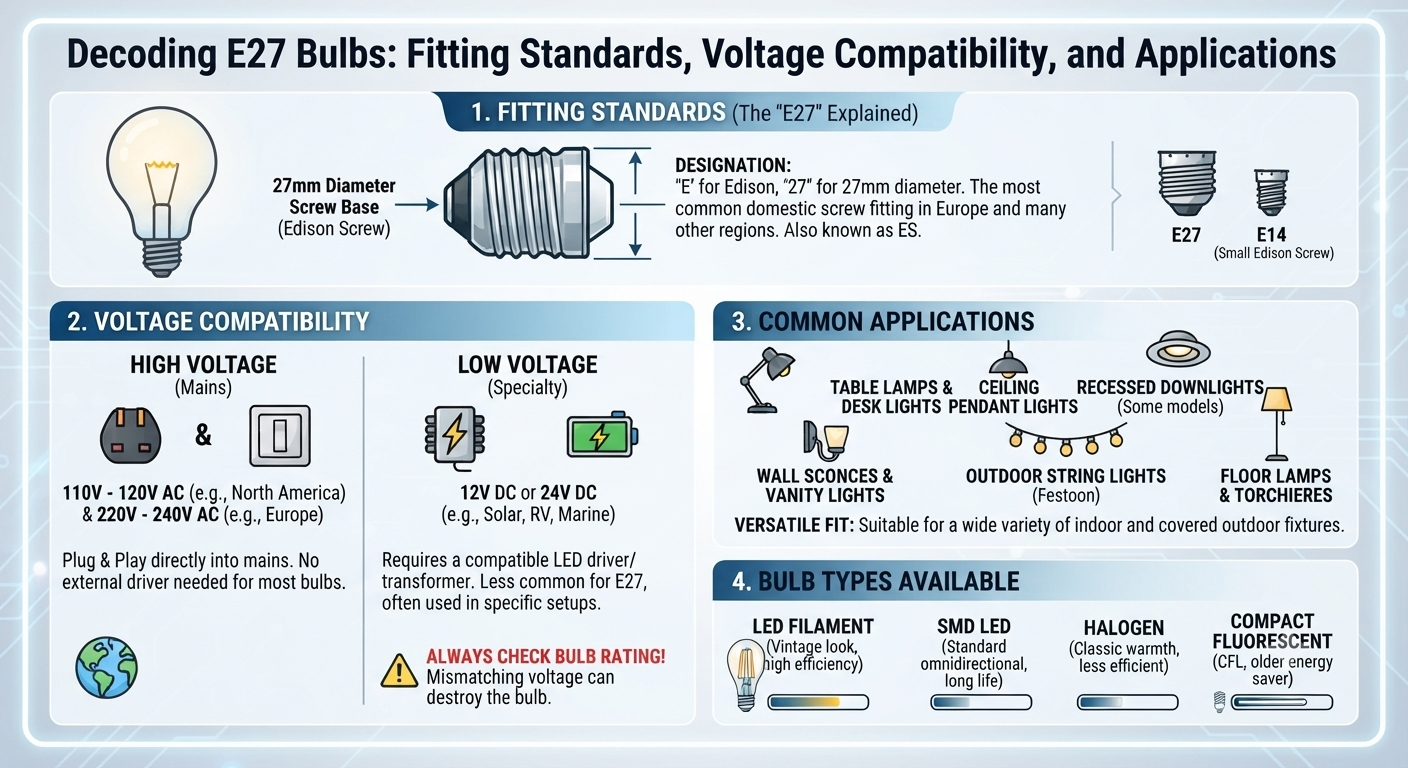
- Wide range of shapes and base types
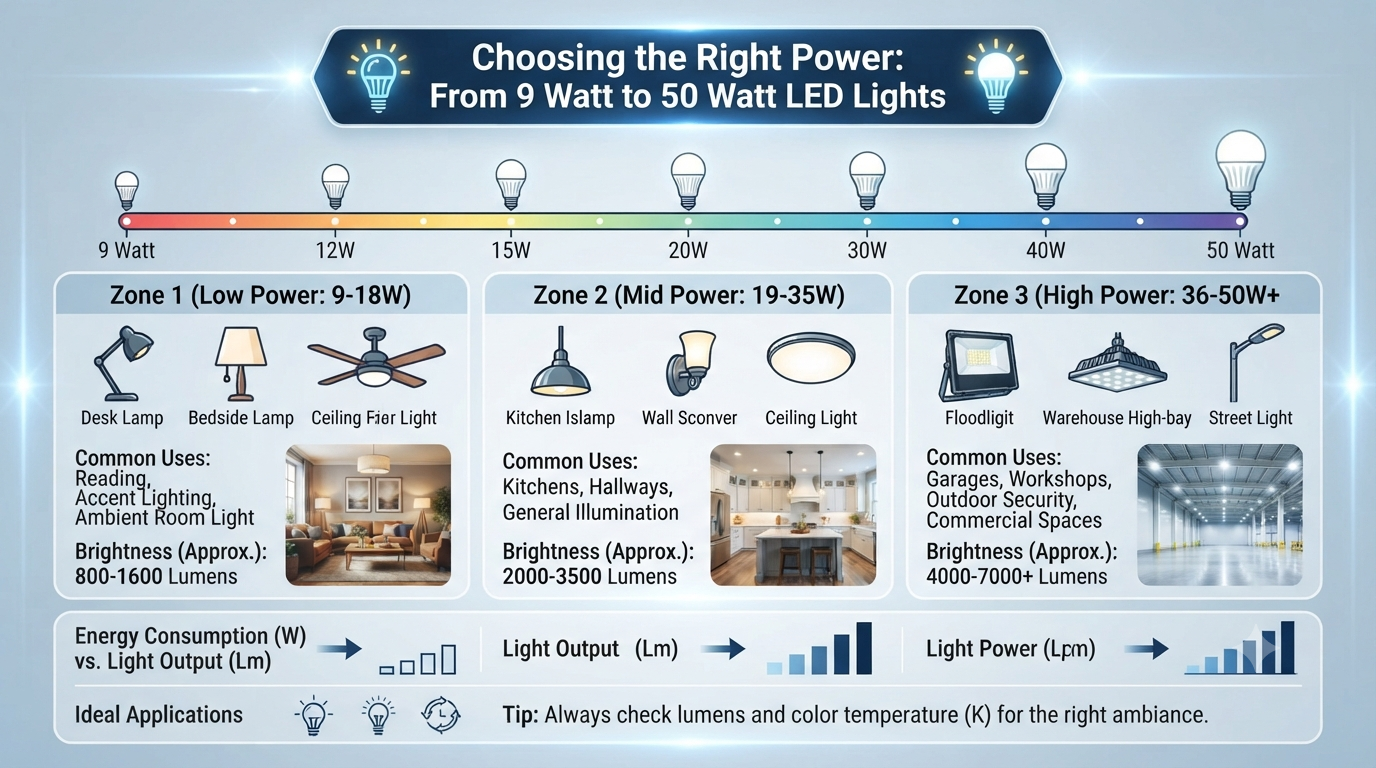
When choosing a bulb for ambient lighting, focus on lumens rather than watts.
Wattage tells you how much electricity the bulb consumes.
Lumens tell you how much visible light it produces.
For example, a modern 10W LED may produce substantially more light than an older 10W incandescent lamp.
The same principle applies when replacing traditional lamps with LEDs.
Using Downlights for Ambient Illumination
Downlights are a popular option for general room lighting.
They can provide
- Clean ceiling lines
- Directional illumination
- Efficient use of space
- Excellent control of beam distribution
However, downlights should be planned carefully.
A room filled with too many bright downlights can create
- Glare
- Harsh shadows
- Excessive brightness
- A "spotlight" effect
The objective isn't to install as many fixtures as possible.
It is to provide appropriate illumination with sensible spacing and good optical control.
Pro Tip
Before deciding on downlight positions, draw the room layout.
Mark
- Furniture
- Work surfaces
- Walkways
- Cabinets
- Doors
- Architectural features
Then position the fixtures according to how the room will actually be used.
A perfectly symmetrical grid may look good on a ceiling plan but perform poorly in the real room.
Layer 2: Task Lighting
Task lighting is designed for activities that require more focused illumination.
Examples include
- Cooking
- Reading
- Studying
- Working at a desk
- Applying makeup
- Shaving
- Sewing
- Crafting
- Food preparation
Task lighting should be placed close to the activity.
This is one of the biggest differences between ambient and task lighting.
A ceiling fixture may illuminate a room adequately but still leave a desk, countertop, or workbench poorly lit.
The solution is not necessarily a brighter ceiling light.
It is often a better-positioned task light.
Kitchen Task Lighting
The kitchen is one of the best examples of layered lighting.
A typical setup might include
- Ambient: Ceiling LED downlights
- Task: Under-cabinet LED lighting
- Accent: Cabinet or island lighting
When someone stands at a countertop, their body can block ceiling light.
The result is a shadow exactly where food preparation occurs.
Under-cabinet LEDs solve this problem by positioning the light source close to the working surface.
For the best results, use
- Continuous LED strips
- Linear LED fixtures
- Diffused LED profiles
These generally provide more uniform illumination than widely spaced individual light points.
Desk and Home Office Task Lighting
A home office requires careful task lighting.
The goal is to illuminate documents, keyboards, and work surfaces without producing distracting reflections on computer screens.
A good combination might include
- Ambient ceiling lighting
- Adjustable desk lamp
- Indirect wall lighting
Position the task light according to your dominant hand and screen arrangement.
If you're right-handed, placing the light on the left side can reduce shadows when writing.
If you're left-handed, the opposite arrangement may work better.
The important principle is to position the fixture so your body and hands don't block the illumination.
Bathroom Task Lighting
Bathrooms benefit from focused lighting around mirrors and vanities.
A single ceiling downlight directly above the mirror can cast shadows across the face.
Instead, consider
- Vertical LED fixtures on both sides of the mirror
- A properly diffused fixture above the mirror
- Backlit mirrors with integrated LEDs
The goal is balanced facial illumination.
Avoid placing an extremely bright light directly above eye level, as it can create uncomfortable glare.
For bathrooms, fixture selection should also consider the appropriate IP rating for the installation zone and local electrical requirements.
Reading and Bedside Task Lighting
A bedroom doesn't need to be brightly illuminated everywhere.
Instead, use softer ambient lighting and stronger task lighting where reading takes place.
A practical combination might include
- Warm LED ceiling fixture
- Bedside reading lamp
- Optional wall-mounted reading light
This allows one person to read without flooding the entire room with bright light.
Adjustable fixtures are particularly useful because you can direct the beam exactly where needed.
Layer 3: Accent Lighting
Accent lighting is where lighting design becomes more expressive.
Its purpose is to draw attention to something.
That could be
- Artwork
- A textured wall
- Shelving
- Architectural details
- Plants
- Display cabinets
- Decorative objects
Accent lighting often uses a higher level of contrast than ambient lighting.
This creates visual hierarchy.
Your eyes naturally move toward brighter or more visually distinctive areas.
That's why accent lighting is so effective in interior design.
Accent Lighting With LED Spotlights
LED spotlights are excellent for highlighting specific objects.
You can use them to illuminate
- Paintings
- Sculptures
- Wall art
- Decorative displays
The beam angle is crucial.
A narrow beam creates a concentrated highlight.
A wider beam provides softer coverage.
For artwork, adjustable spotlights are often preferable because they allow you to fine-tune the aiming angle after installation.
Pro Tip
Don't aim accent lights directly at glossy artwork or reflective surfaces.
Instead, adjust the angle to minimize reflected glare.
This is particularly important for
- Glass-framed artwork
- Polished stone
- Glossy cabinets
- Mirrors
- Accent Lighting With LED Strips
LED strips can create subtle architectural lighting.
Common applications include
- Behind televisions
- Under shelves
- Inside display cabinets
- Along staircases
- Under beds
- Behind headboards
- Under kitchen cabinets
- Along ceiling coves
The best accent lighting is often indirect.
You see the effect of the light rather than the LED source itself.
This creates a softer and more sophisticated appearance.
Cove Lighting
Cove lighting uses an architectural recess or concealed channel to direct light onto a ceiling or wall.
LED strips are particularly suitable for this application because they are
- Flexible
- Slim
- Easy to conceal
- Available in different color temperatures
Cove lighting can provide a gentle layer of indirect illumination.
It can also reduce the need to operate bright overhead fixtures during evening hours.
For a high-quality installation, use aluminum profiles where appropriate to improve thermal management and create a clean diffuser finish.
How Bright Should Each Lighting Layer Be?
There is no universal brightness ratio that works for every room.
However, the layers should not all operate at maximum output simultaneously.
A practical approach is
- Ambient
Provides the primary general illumination.
Task
Provides stronger localized illumination where detailed work takes place.
Accent
Provides visual contrast rather than trying to illuminate the entire room.
For example, in a living room
- Ambient lights might be dimmed to 50–70%
- Reading light operates at a higher level near the chair
- Accent lights softly illuminate artwork or shelving
This creates depth.
The room can feel brighter without every fixture operating at full power.
Lumens vs. Watts: Choosing the Right LED Bulbs
- When selecting light bulbs, remember
- Watts = energy consumption
- Lumens = light output
This is particularly important when upgrading from incandescent lighting.
A high-wattage incandescent bulb isn't necessarily brighter than a low-wattage LED.
For example, if you're replacing an old incandescent bulb, look for an LED with a similar lumen output rather than simply matching wattage.
For larger lighting projects, also consider the total lumen output of the entire room.
One 1,500-lumen fixture may produce a very different experience from three 500-lumen fixtures.
The total lumens are similar, but the distribution is completely different.
Color Temperature and Layered Lighting
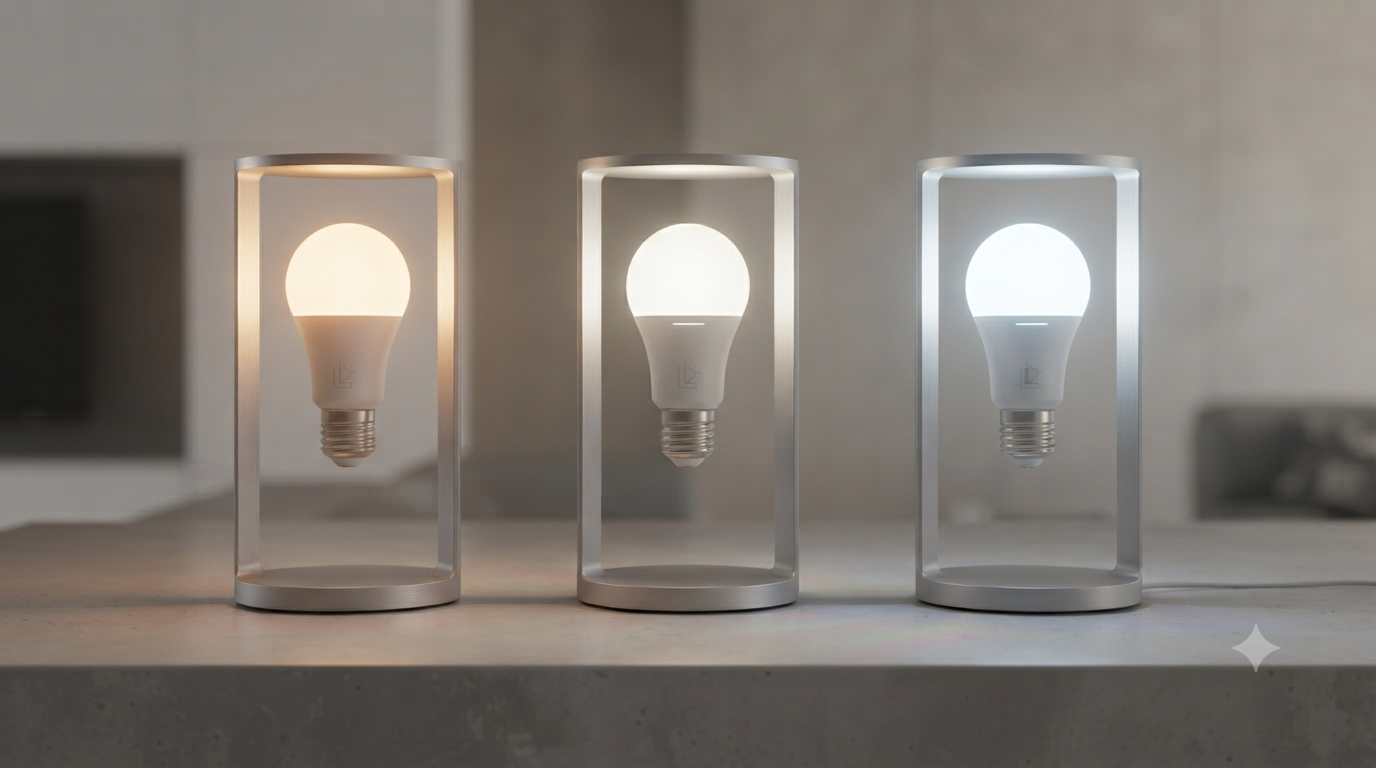
Color temperature is measured in Kelvin (K).
Common ranges include
- 2700K–3000K
Warm white.
Ideal for
- Bedrooms
- Living rooms
- Dining areas
- Hospitality spaces
- 3500K–4000K
Neutral white.
Suitable for
- Kitchens
- Bathrooms
- Offices
- General-purpose areas
- 5000K–6500K
Cool white or daylight.
Often used for
- Garages
- Workshops
- Utility areas
- Certain commercial environments
For residential layered lighting, warmer color temperatures often work well for ambient and accent lighting.
Task lighting may use a neutral white tone when greater visual clarity is desired.
However, mixing color temperatures should be deliberate.
A warm 2700K accent light next to a 6500K ceiling fixture can look inconsistent if the contrast isn't intentional.
CRI: Why Color Rendering Matters
CRI, or Color Rendering Index, measures how accurately a light source reveals colors compared with a reference source.
High-quality LEDs with good color rendering can make
- Food look more natural
- Wood appear richer
- Paint colors look more accurate
- Clothing colors appear more realistic
For general residential lighting, CRI 80+ is a common baseline.
For kitchens, retail spaces, art displays, and areas where color accuracy matters, higher-CRI LEDs may be preferable.
Remember
Kelvin tells you the apparent color of the light.
CRI tells you how accurately objects appear under that light.
They're related to visual quality but measure different characteristics.
Beam Angle and Light Distribution
Beam angle determines how widely light spreads.
Narrow Beam
- Best for
- Accent lighting
- Artwork
- Architectural features
- Medium Beam
- Suitable for
- Task lighting
- Focused work areas
- Smaller zones
- Wide Beam
- Useful for
- Ambient illumination
- Large rooms
- General coverage
A common mistake is using narrow-beam downlights for general room illumination.
This can create bright circles surrounded by darker areas.
For ambient lighting, a wider beam often produces more comfortable coverage.
For accent lighting, a narrower beam can create useful contrast.
Dimming: The Secret to Flexible Layered Lighting
Dimming is one of the most effective ways to make layered lighting work.
Without dimming, you have only "on" and "off."
With dimming, each layer can be adjusted to suit the activity.
Consider a living room.
Daytime
- Ambient: High
- Task: Medium
- Accent: Low
- Evening
- Ambient: Medium
- Task: Medium
- Accent: Medium
- Movie Night
- Ambient: Low
- Task: Low
- Accent: Very Low
This creates flexibility without changing fixtures.
However, not every LED is automatically compatible with every dimmer.
Check
- LED dimming compatibility
- Driver specifications
- Minimum load requirements
- Flicker performance
- Poor compatibility can cause
- Flickering
- Buzzing
- Limited dimming range
- Sudden shutoff
- Smart LED Lighting and Lighting Scenes
Smart LEDs can take layered lighting one step further.
Depending on the system, you can control
- Brightness
- Color temperature
- Scheduling
- Scenes
- Voice commands
- Motion activation
- You could create presets such as
- Work
Bright ambient + strong task lighting.
Relax
Dimmed ambient + warm accent lighting.
Entertain
Moderate ambient + decorative accent lighting.
Night
Very low-level pathway or accent lighting.
Smart controls are useful, but they shouldn't replace good fixture placement.
A poorly positioned smart LED is still a poorly positioned light.
A Practical Layered Lighting Example: Living Room
Imagine a 20-square-meter living room.
A practical lighting strategy might include
- Ambient
Four or six dimmable LED downlights or a central ceiling fixture.
Task
A floor lamp beside a reading chair.
Accent
Adjustable LED spotlights aimed at artwork.
Decorative
LED strip lighting behind a media unit or inside shelving.
Now each lighting source has a job.
You don't need to turn everything on at maximum brightness.
For normal evening use, you might run
- Ambient at moderate brightness
- Reading light only when needed
- Accent lighting at low intensity
The room feels layered rather than flat.
A Practical Layered Lighting Example: Bedroom
Bedrooms generally benefit from softer lighting.
Consider
- Ambient: Warm LED ceiling fixture
- Task: Bedside reading lamps
- Accent: LED strip behind headboard or under furniture
This gives you three distinct lighting modes.
You can fully illuminate the room when cleaning.
You can use bedside lights for reading.
Or you can activate only the soft accent lighting for a relaxed evening environment.
A Practical Layered Lighting Example: Kitchen
- A kitchen might use
- Ambient: Ceiling LED downlights
- Task: Under-cabinet LED lighting
- Accent: Cabinet interior lighting
- Decorative: Pendant lights above an island
The result is both practical and visually dynamic.
The countertop receives direct task illumination.
The ceiling provides general visibility.
The cabinet lighting adds depth.
The pendants define the island as a focal point.
How to Layer Lighting in a Small Room
Small rooms don't need fewer lighting layers.
They simply need smaller and more carefully selected fixtures.
For example, a small bedroom could use
- One dimmable ceiling LED
- One bedside lamp
- One concealed LED strip
That's enough to create three layers without cluttering the ceiling.
The key is to avoid over-lighting.
A small room filled with high-output downlights can feel harsh and visually compressed.
How to Layer Lighting in a Large Room
Large open-plan spaces often need more sophisticated layering.
Instead of treating the entire room as one lighting zone, divide it into functional areas.
For example
- Kitchen Zone
- Downlights + under-cabinet LEDs
- Dining Zone
- Pendant fixture
- Living Zone
- Ambient ceiling lights + floor lamps + accent lighting
Each zone should have independent controls where practical.
This allows the room to adapt to different activities.
Common Layered Lighting Mistakes
- Mistake 1: Using Only One Central Light
This creates flat illumination and shadows.
Mistake 2: Making Every Light Equally Bright
Different lighting layers should have different roles.
Mistake 3: Ignoring Glare
A bright fixture isn't automatically a good fixture.
Mistake 4: Using Too Many Downlights
More fixtures can increase glare and energy consumption without improving visual comfort.
Mistake 5: Mixing Random Color Temperatures
Color temperature differences should be intentional.
Mistake 6: Choosing Wattage Instead of Lumens
Always compare actual light output.
Mistake 7: Forgetting CRI
Poor color rendering can make an otherwise attractive space look dull.
Mistake 8: Installing Accent Lighting Everywhere
Accent lighting works because it creates hierarchy. If everything is highlighted, nothing stands out.
Mistake 9: Connecting Every Fixture to One Switch
Separate control zones provide much more flexibility.
Expert Checklist for Layered LED Lighting
- Before finalizing your lighting plan, ask
- Ambient
- Is the room evenly and comfortably illuminated?
- Are the LED bulbs or downlights bright enough?
- Is glare controlled?
- Task
- Is the work surface adequately illuminated?
- Will people cast shadows onto the task area?
- Can the light be adjusted?
- Accent
- What features deserve attention?
- Is the beam angle appropriate?
- Can the fixture be aimed precisely?
- Color
- Is the color temperature consistent?
- Is the CRI suitable for the application?
- Controls
- Can each lighting layer be controlled separately?
- Are the LEDs compatible with the selected dimmers?
- Would smart controls provide genuine value?
- Efficiency
- Are you using more light than necessary?
- Are high-efficiency LED fixtures being used?
- Is the system designed for long-term operation?
- Frequently Asked Questions
- What are the three layers of lighting?
The three primary layers are ambient, task, and accent lighting. Ambient lighting provides general illumination, task lighting focuses on areas where specific activities occur, and accent lighting highlights architectural features, artwork, displays, or decorative elements.
Can LED downlights be used for both ambient and accent lighting?
Yes. The same basic downlight technology can serve different purposes depending on its lumen output, beam angle, aiming capability, and placement. Wide-beam downlights are often suitable for general illumination, while adjustable or narrower-beam fixtures can be used for accent lighting.
How many LED light bulbs do I need for a room?
There is no fixed number. The required quantity depends on room size, ceiling height, fixture lumen output, beam angle, surface reflectance, and the intended use of the space. It is usually better to calculate the required illumination and distribute the light appropriately rather than simply adding more bulbs.
Should ambient, task, and accent lighting have the same color temperature?
Not necessarily, but consistency within a visual zone is usually desirable. Many residential spaces use warm white LEDs around 2700K–3000K for ambient and accent lighting, while kitchens and work areas may use 3000K–4000K. If you mix color temperatures, do so intentionally.
Final Takeaway: Think in Layers, Not Just Light Bulbs
Effective lighting isn't about filling a room with the highest possible number of lumens.
It's about putting light where it is useful and creating contrast where it is visually valuable.
Use LED light bulbs and downlights to establish comfortable ambient illumination. Add task lighting wherever people read, cook, work, groom, or perform detailed activities. Then introduce accent lighting to highlight artwork, architecture, shelving, cabinetry, or other features worth seeing.
The strongest lighting designs also consider
Lumens. Wattage. Beam angle. Color temperature. CRI. Glare. Dimming. Driver quality. Control zones.
A well-layered LED lighting system should feel almost effortless. The room is bright when you need it, focused where work happens, and softer when you want to relax.
The formula is simple
Ambient lighting makes the space usable. Task lighting makes it functional. Accent lighting gives it character.
Combine all three thoughtfully, and even a basic room can feel more comfortable, more efficient, and significantly more sophisticated.